https://www.electronicwings.com/esp32/max7219-7-segment-display-interfacing-with-esp32
MAX7219 7-Segment Display Interfacing with ESP32 | ESP32
In this guide, we will learn how to Interface the MAX7219 7-Segment Display with ESP32 and print the 0 to 7 digits on the display using Arduino IDE and ESP32.
www.electronicwings.com

SPI 통신을 사용하여
여러 7세그먼트 디스플레이를 구동하기 위해
MAX7219와 같은 IC를 사용하는
다양한 디스플레이 모듈이 시장에 나와 있습니다.
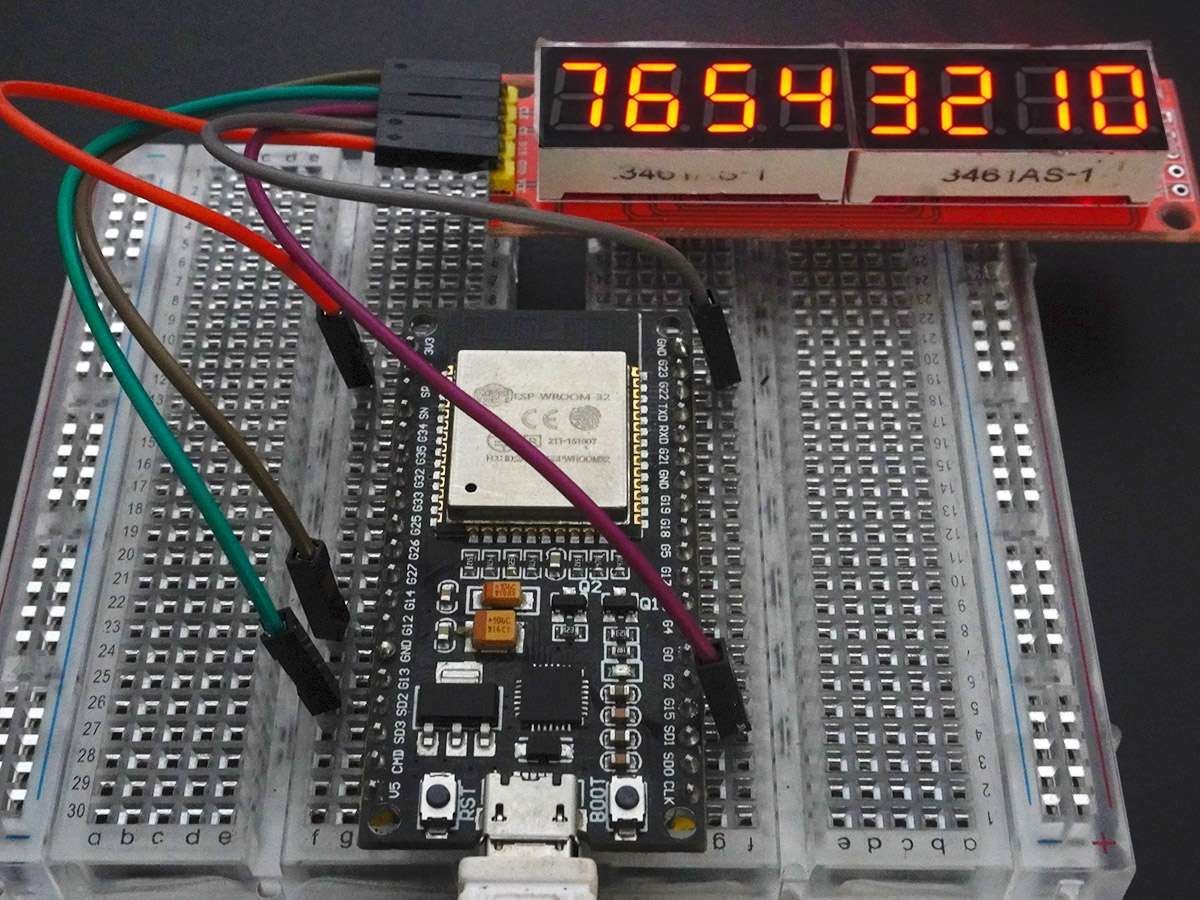
이러한 모듈 중 하나가 아래 이미지에 표시되어 있습니다.
이 모듈은 캐스케이드에서
단일 7세그먼트 디스플레이를 사용하는 것에 비해
크기가 작고 핀과 와이어가 거의 필요하지 않습니다.

MAX7219 ESP32를 사용한 7세그먼트 디스플레이 하드웨어 연결

Display 0 to 7 Digit on 7 Segment display
여기서는 LedController 라이브러리를 사용했습니다 .
아래 링크에서 라이브러리를 다운로드하세요.
https://www.arduino.cc/reference/en/libraries/ledcontroller/
Code for MAX7219 with ESP32
/**
 * @file LCDemo7Segment.ino
 * @author Noa Sakurajin (noasakurajin@web.de)
 * @brief using the ledcontroller with 7-segment displays
 * @version 0.1
 * @date 2020-12-30
 *
 * @copyright Copyright (c) 2020
 *
 */

#include "LedController.hpp"
/*
 You might need to change the following 3 Variables depending on your board.
 pin 15 is connected to the DataIn
 pin 14 is connected to the CLK
 pin 13 is connected to LOAD/ChipSelect
*/
#define DIN 15
#define CS 13
#define CLK 14

/*
 Now we need a LedController Variable to work with.
 We have only a single MAX72XX so the Dimensions are 1,1.
 */
LedController<1,1> lc;

/* we always wait a bit between updates of the display */
unsigned long delaytime=1000;

void setup() {
  //Here a new LedController object is created without hardware SPI.
  lc=LedController<1,1>(DIN,CLK,CS);
  lc.setIntensity(8); /* Set the brightness to a medium values */
  lc.clearMatrix(); /* and clear the display */
}

void loop() {
  for(int i=0; i<8; i++) {
    lc.setDigit(0,i,i,false);
    delay(delaytime);
  }
  lc.clearMatrix();
  delay(delaytime);
}
- 이제 코드를 업로드하세요. (코드를 업로드하는 동안 ESP32 보드가 부팅 모드에 있는지 확인하세요.)
Output
Let’s Understand the code
SPI 핀 번호 설정
#define DIN 15
#define CS 13
#define CLK 14
사용할 LedController 변수가 필요합니다
MAX72XX가 하나만 있으므로 Dimensions은 1,1입니다.
LedController<1,1> lc;
디스플레이가 업데이트되도록 약간 기다려야합니다.
unsigned long delaytime=1000;In setup function
여기에 LedController 의 새로운 객체를 생성합니다.
lc=LedController<1,1>(DIN,CLK,CS);
디스플레이 밝기를 중간 값으로 설정
lc.setIntensity(8);
디스플레이 지우기
lc.clearMatrix();In loop function
자리수를 설정하여 7세그먼트 디스플레이에 표시
for(int i=0; i<8; i++) {
  lc.setDigit(0,i,i,false);
  delay(delaytime);
}
여기서 지연 시간을 기다리세요
delay(delaytime);'ESP32' 카테고리의 다른 글
| ESP32 Timers & Timer Interrupts (1) | 2023.12.22 |
|---|---|
| MQTT on ESP32- Publish- Subscribe Beginners Guide (1) | 2023.12.22 |
| ESP32 with Firebase – Creating a Web App (0) | 2022.05.05 |
| ESP32에서 인터럽트 사용하기 (0) | 2022.03.18 |
| ESP8266 and the Arduino IDE (0) | 2022.03.13 |