이 튜토리얼에서는 Arduino로 일상적인 작업을 수행하는 방법을 보여줍니다.
우리는 매일 특정 시간에 LED를 켜고 끌 것입니다.
그런 다음 제공된 예제를 쉽게 수정하여 다른 작업을 수행할 수 있습니다.

프로젝트 개요
- 이 프로젝트는 DS1307 실시간 클록 모듈 을 사용하여 시간 을 추적합니다. RTC 모듈에 대한
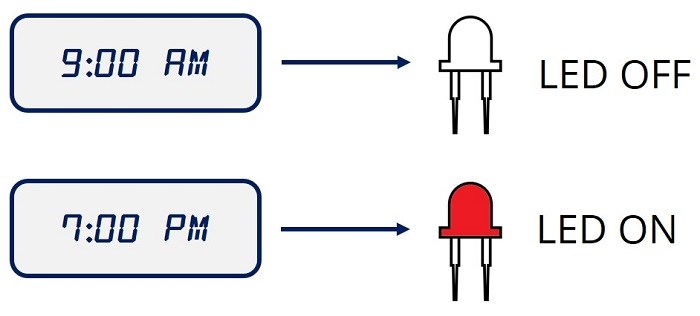
소개 는 Arduino가 포함된 실시간 클록 모듈 가이드(DS1307 및 DS3231)를 참조 하십시오. - 제공된 예제는 매일 오후 7시에 LED를 켭니다. 매일 오전 9시에 꺼집니다.
- 코드를 쉽게 수정하여 고유한 이벤트와 발생 시간을 트리거할 수 있습니다.
필요한 부품
개략도
아래 회로도와 같이 DS1307 RTC 모듈을 Arduino와 LED에 연결합니다.

다음 표를 참조하여 DS1307 RTC 모듈을 Arduino에 연결할 수도 있습니다.
| DS1307 RTC 모듈 핀 | Arduino Uno에 배선 |
| SCL | A5 |
| SDA | A4 |
| VCC | 5V |
| GND | GND |
라이브러리 설치
이 예 \에서는 Michael Margolis가 만들고 Paul Stoffregen이 유지 관리하는
Time , TimeAlarms 및 DS1307RTC 라이브러리를 설치해야 합니다 .

이러한 라이브러리를 설치하려면 Arduino IDE에서
Sketch > Include Library > Manage Libraries로 이동 합니다.
그런 다음 라이브러리 이름을 입력하여 설치합니다.

DS1307 RTC 모듈 시간 설정
DS1307 RTC 모듈 시간을 설정하려면
다음 스케치를 Arduino 보드에 업로드하고 한 번 실행해야 합니다.
/*
SetTime.ino sketch to set the time of DS1307 RTC - created by Paul Stoffregen
github.com/PaulStoffregen/DS1307RTC/blob/master/examples/SetTime/SetTime.ino
 */

#include <Wire.h>
#include <TimeLib.h>
#include <DS1307RTC.h>

const char *monthName[12] = {
  "Jan", "Feb", "Mar", "Apr", "May", "Jun",
  "Jul", "Aug", "Sep", "Oct", "Nov", "Dec"
};

tmElements_t tm;

void setup() {
  bool parse=false;
  bool config=false;

  // get the date and time the compiler was run
  if (getDate(__DATE__) && getTime(__TIME__)) {
    parse = true;
    // and configure the RTC with this info
    if (RTC.write(tm)) {
      config = true;
    }
  }

  Serial.begin(9600);
  while (!Serial) ; // wait for Arduino Serial Monitor
  delay(200);
  if (parse && config) {
    Serial.print("DS1307 configured Time=");
    Serial.print(__TIME__);
    Serial.print(", Date=");
    Serial.println(__DATE__);
  } else if (parse) {
    Serial.println("DS1307 Communication Error :-{");
    Serial.println("Please check your circuitry");
  } else {
    Serial.print("Could not parse info from the compiler, Time=\"");
    Serial.print(__TIME__);
    Serial.print("\", Date=\"");
    Serial.print(__DATE__);
    Serial.println("\"");
  }
}

void loop() {
}

bool getTime(const char *str)
{
  int Hour, Min, Sec;

  if (sscanf(str, "%d:%d:%d", &Hour, &Min, &Sec) != 3) return false;
  tm.Hour = Hour;
  tm.Minute = Min;
  tm.Second = Sec;
  return true;
}

bool getDate(const char *str)
{
  char Month[12];
  int Day, Year;
  uint8_t monthIndex;

  if (sscanf(str, "%s %d %d", Month, &Day, &Year) != 3) return false;
  for (monthIndex = 0; monthIndex < 12; monthIndex++) {
    if (strcmp(Month, monthName[monthIndex]) == 0) break;
  }
  if (monthIndex >= 12) return false;
  tm.Day = Day;
  tm.Month = monthIndex + 1;
  tm.Year = CalendarYrToTm(Year);
  return true;
}
이것은 Arduino IDE 직렬 모니터에서 볼 수 있는 것입니다:

시간과 날짜가 올바르게 설정되면 이 프로젝트를 계속하고 최종 스케치를 업로드할 수 있습니다.
CODE
제공된 코드는 매일 아침 9시에 LED를 끄고 매일 저녁 7시에 켭니다.
다음 코드를 Arduino IDE에 복사하고 Arduino 보드에 업로드합니다.
/*
 *
 * Complete project details at https://randomnerdtutorials.com
 * Based on TimeAlarmExample from TimeAlarms library created by Michael Margolis
 *
 */

#include <TimeLib.h>
#include <TimeAlarms.h>
#include <Wire.h>
#include <DS1307RTC.h>  // a basic DS1307 library that returns time as a time_t

const int led = 7;

void setup() {
  // prepare pin as output
  pinMode(led, OUTPUT);
  digitalWrite(led, LOW);

  Serial.begin(9600);
  // wait for Arduino Serial Monitor
  while (!Serial) ;

  // get and set the time from the RTC
  setSyncProvider(RTC.get);
  if (timeStatus() != timeSet)
     Serial.println("Unable to sync with the RTC");
  else
     Serial.println("RTC has set the system time");

  // to test your project, you can set the time manually
  //setTime(8,29,0,1,1,11); // set time to Saturday 8:29:00am Jan 1 2011

  // create the alarms, to trigger functions at specific times
  Alarm.alarmRepeat(9,0,0,MorningAlarm);  // 9:00am every day
  Alarm.alarmRepeat(19,0,0,EveningAlarm);  // 19:00 -> 7:00pm every day
}

void loop() {
  digitalClockDisplay();
  // wait one second between each clock display in serial monitor
  Alarm.delay(1000);
}

// functions to be called when an alarm triggers
void MorningAlarm() {
  // write here the task to perform every morning
  Serial.println("Tturn light off");
  digitalWrite(led, LOW);
}
void EveningAlarm() {
  // write here the task to perform every evening
  Serial.println("Turn light on");
  digitalWrite(led, HIGH);
}

void digitalClockDisplay() {
  // digital clock display of the time
  Serial.print(hour());
  printDigits(minute());
  printDigits(second());
  Serial.println();
}
void printDigits(int digits) {
  Serial.print(":");
  if (digits < 10)
    Serial.print('0');
  Serial.print(digits);
}
이 코드는 이해하기 쉽고 쉽게 수정할 수 있습니다.
코드가 어떻게 작동하는지 알아보려면 이 페이지를 계속 읽으십시오.
라이브러리 가져오기
먼저 시간 알람을 생성하고 RTC 모듈과 상호 작용하는 데 필요한 라이브러리를 가져옵니다.
#include <TimeLib.h>
#include <TimeAlarms.h>
#include <Wire.h>
#include <DS1307RTC.h>
시간 얻기
setup() 에서 다음 줄을 사용하여 RTC 시간을 얻습니다.
setSyncProvider(RTC.get);또한 직렬 모니터에 메시지를 표시하여 시간이 성공적으로 동기화되었는지 여부를 알 수 있습니다
if (timeStatus() != timeSet)
  Serial.println("Unable to sync with the RTC");
else
 Serial.println("RTC has set the system time");
시간을 수동으로 설정할 수 있습니다. 다음 줄의 주석 처리를 제거하기만 하면 됩니다.
이것은 시간을 쉽게 수정하고 알람이 트리거되는지 테스트할 수 있기 때문에
스케치를 테스트하는 데 특히 유용합니다.
//setTime(8,29,0,1,1,11); // set time to Saturday 8:29:00am Jan 1 2011알람 설정
다음 줄은 매일 오전 9시에 MorningAlarm함수을 트리거합니다 .
MorningAlarm은 loop()에서 정의됩니다.
Alarm.alarmRepeat(9,0,0, MorningAlarm); // 9:00am every day시간을 변경하려면 원하는 시간으로 숫자 9,0,0 을 변경하면 됩니다 .
첫 번째 숫자는 시간, 두 번째 숫자는 분, 세 번째 숫자는 초입니다.
EveningAlarm함수는 오후 7:00 매일 트리거됩니다.
Alarm.alarmRepeat(19,0,0, EveningAlarm); // 19:00 -> 7:00pm every dayloop()
loop() 에서 digitalClockDisplay ()를 호출함으로 직렬 모니터 매초 시간을 표시할 수 있습니다..
void loop() {
  digitalClockDisplay();
  Alarm.delay(1000); // wait one second between clock display
}
Defining the tasks
MorningAlarm () 및 EveningAlarm () 함수는 setup()에서 한 번에 호출됩니다.
Task를 편집하려면 MorningAlarm() 및 EveningAlarm() 함수 내에 작업을 작성하기만 하면 됩니다.
void MorningAlarm() {
  // write here the task to perform every morning
  Serial.println("Alarm: - turn lights off");
  digitalWrite(led, LOW);
}

void EveningAlarm() {
  // write here the task to perform every evening
  Serial.println("Alarm: - turn lights on");
  digitalWrite(led, HIGH);
}
여기서는 직렬 모니터에 메시지를 인쇄하고 LED를 켜고 끕니다.
아이디어는 이 예제를 사용하여 Arduino가 매일 동시에 유용한 작업을 수행하도록 하는 것입니다.
마무리
이 튜토리얼에서는 Arduino로 일상적인 작업을 수행하는 방법을 보여주었습니다.
제공된 예제는 간단하므로 프로젝트에 쉽게 적용할 수 있습니다.
다음은 이 기술을 사용하여 자동화할 수 있는 작업에 대한 몇 가지 아이디어입니다.
- 특정 시간에 조명 켜기/끄기
- 블라인드를 닫아라
- 애완동물에게 먹이를 주세요
[출처번역인용] https://randomnerdtutorials.com/how-to-do-daily-tasks-with-arduino/
How To Do Daily Tasks with Arduino | Random Nerd Tutorials
In this tutorial you'll learn how perform daily tasks with the Arduino. We're going to turn an LED on and off at a specific time of the day, everyday.
randomnerdtutorials.com